How to Protect Wood Worktops Around the Sink Area?

Last Updated on May 30, 2023
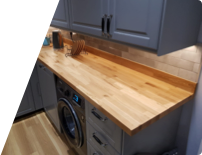
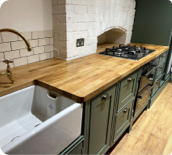
Wooden worktops look great, are hygienic, can be repaired, are the most sustainable kitchen worktop type, they mature with age and etc. But how do we prevent them from turning into a headache around the sink area?
In House of Worktops®, we offer a dedicated 60-day carpenter support to all our customers and the question around protecting the sink area of wooden worktops makes up about 50% of all questions we receive. And the answers we give during our consultations are always the same:
“It is all about the very beginning – how correctly you initially install and oil your worktop”
That is what is going to determine how easy your worktop is to maintain and how well-protected the sink area is. Here is a breakdown of the things we recommend paying attention to early on, to avoid problems in the future:
Steps to Protecting your Worktop:
- Oil the underside of the worktop prior to installation. Given the higher humidity level all around the sink area, you need to make sure you have sealed your timber worktop on the top and bottom sides.
- Oil the exposed end grain of the wooden worktop within your sink cutout. For under-mount and belfast sinks an additional 2 coats of oil will be needed after installation and for an overmount a single coat is enough.

- Create a water-tight seal between the worktop and the sink with a sealant. That will prevent any water from seeping under the worktop.
- Add drainage grooves to your worktop as they allow the water splashes to seep back into the sink. That is only valid for undermount and belfast sinks.
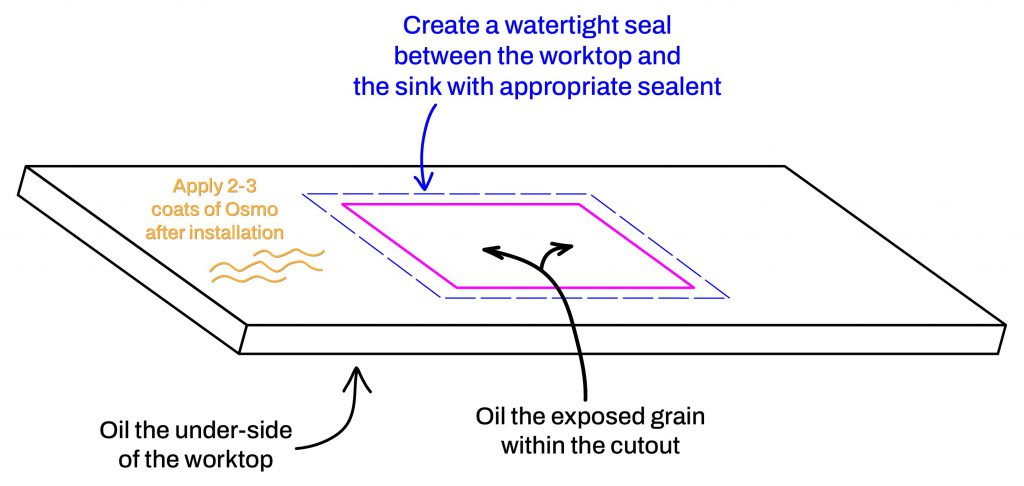
- After installation, oil your worktop another 2-3 times with Osmo or 3-4 times with Danish Oil. This is one of the most important steps, as a perfectly protected worktop sink area is easy to maintain.
- Wipe down water splashes. Refer to our Maintenance & Care Guide
- IMPORTANT: Do your water test and re-oil your worktop once you see it is needed. Worktop Sink areas are essentially no different to any other area of your worktop, the only difference is that you spend more time around this area and hence there is more wear and tear. Therefore, simply because the rest of your worktops are looking fresh and well-maintained, does not mean that your sink worktop is also well-maintained. Treat your worktops separately, some parts are used more than others and hence why they need to be re-oiled more frequently than the rest.
Similarly, sink worktops usually get the highest level of wear and tear and that is why you need to re-oil them more frequently than the rest of your countertops. The moment you spot a stain, discolouration or the water sitting flat on it, it is time to give it a coat of oil – even if the rest of your timber tops look to be in pristine condition.
As seen above, most of the tasks that will ensure your worktops are well-maintained and protected around the sink area are done prior to and immediately after installation.
Check out our Oak worktops
Shop now
Check out our Oak worktops
Shop now
How to repair discolorations and stains on the worktop around my sink area?
Life can sometimes get in the way and you might be a little too busy to re-oil your worktop and therefore get a stain or a discolouration. There is nothing to worry about. The ability of wooden worktops to be sanded and restored back to their original glory is one of their biggest advantages.
If you get a stain, please follow the steps below or refer to our complete guide on repairs:
- Sand the area with 80 grit sanding disc and an orbital sander.
- Sand until you get to bare wood and remove the stain or the scratch
- Go over the area with a moist paper towel or piece of cloth to reveal any shadow scratches.
- Sand the surface back up to 120 grit
- Apply a very thin coat of Osmo/Danish Oil only to the repaired area and allow 24 hours to dry
- Repeat the process until you build up 3 coats of Osmo Oil.
Once you have built up the oil protection, now you need to make sure the finish is seamless - Sand ALL the worktops lightly with 240 grit. The worktops will go slightly pale, but that is completely normal.
- Wipe off the dust from the surface.
- Apply Osmo Top Oil to all the worktops and cover all areas.
- Remove all the excess with a paper towel.
- Frequently change your paper towel, apply pressure as if you are trying to polish and remove ANY oil from the surface
- Use a source of light at the background to check for any pooling. The finish should be consistent and almost dry to touch
- Allow 12 hours to dry and enjoy your newly finished and repaired worktops!
We hope that you enjoyed the process and that you found our guide helpful! Please let us know if you have any other questions or anything else we can be of help with.
If you have any questions about anything worktop related, please do not hesitate to
get in touch with us!
You can find us at 01727260688 or [email protected]
https://houseofworktops.co.uk/
Enjoy your kitchen and wood worktops!
For additional topics please check the links below:
1) How to Oil Your Worktops with Osmo?
2) How to apply Danish Oil on your worktop?
3) How to repair a scratch on a Wooden Worktop?
4) A comprehensive comparison of all Wood Worktop Oils.
5) Kitchen Worktop Height: Everything You Need To Know
7) How to Store Wood Worktops?
8) Worktop Installation Guide
9) Care & Maintenance Guide for Wood Worktops
Antonia Dragolova