How to Join Kitchen Worktops with Mason’s Mitre Joint

Last Updated on May 30, 2023
Mason’s mitre joint is a terminology initially used in architectural forms, but nowadays it is one of the most popular ways of joining laminate kitchen worktops.
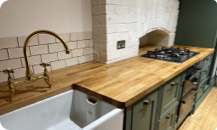
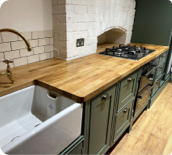
Mitre Joint originally refers to cutting both pieces to a 45-degree angle to form a corner (Figure 1). It is a very aesthetically pleasing way to join wooden surfaces as it provides a seamless joint with almost matching wood grain direction.
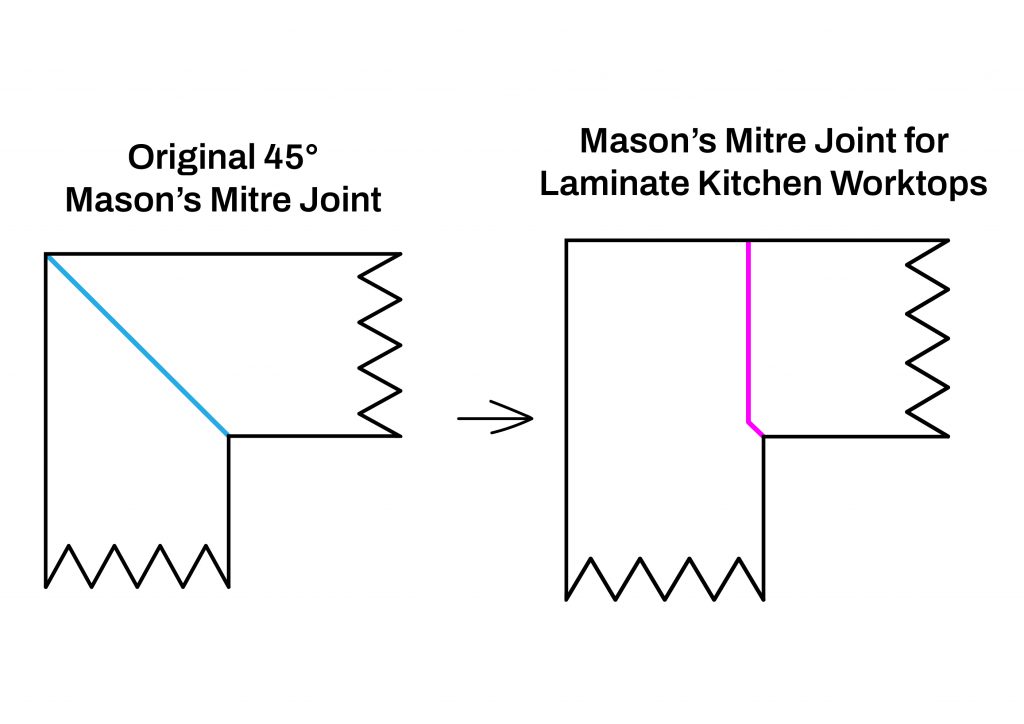
The drawback of the original mitre joint is that it leads to large amounts of wasted material, as both worktops need to be full length and then cut to create the 45 degree Mitre Joint. For that reason, the modern-day Kitchen Worktop Mason’s Mitre Joint combines the best of both worlds – it has a mitred 45-degree section which runs for the first 30-40mm of the worktop and then transitions into a straight butt joint (Fig 1 and 2). So we get the benefit of the aesthetic mitre cut and we prevent wastage!
If you are interested in adding Mason’s Mitre Joint to your worktops, just visit our Custom Worktop Builder or drop us an email to [email protected] with a sketch of your dream worktop and let us take care of the rest!
Check out our Oak worktops
Shop now
Check out our Oak worktops
Shop now
How to Do Mason’s Mitre Joint
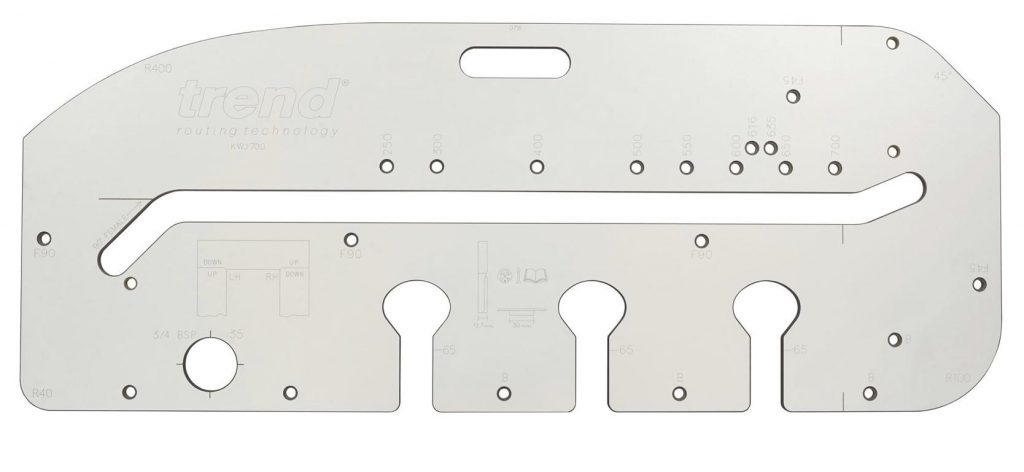
Doing the joint has become incredibly easy thanks to the Worktop Jigs (Fig 3). They come with a male and female side and multiple pin locations that are helping you precisely position the jig for the perfect joint.
Tools for Mason’s Mitre Joint
- Electric Router (Min 1800W)
- Worktop Jig
- Connector Bolts (150mm
- Jigsaw
- Clamps
The joint is done by cutting one of the worktops to a “male” end and the other one to a “female”. Due to the nature of the joint and the way the worktop jig has been produced, we will be turning and working with both sides of the jig and the worktop.
Worktop Jig:
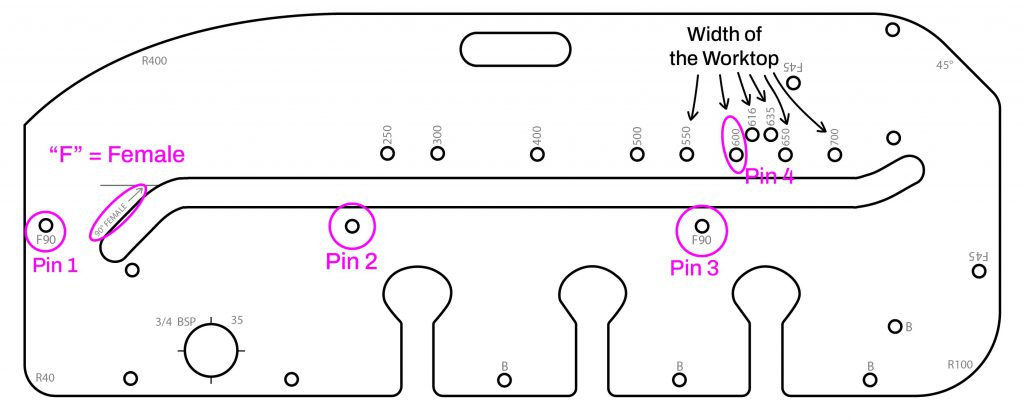
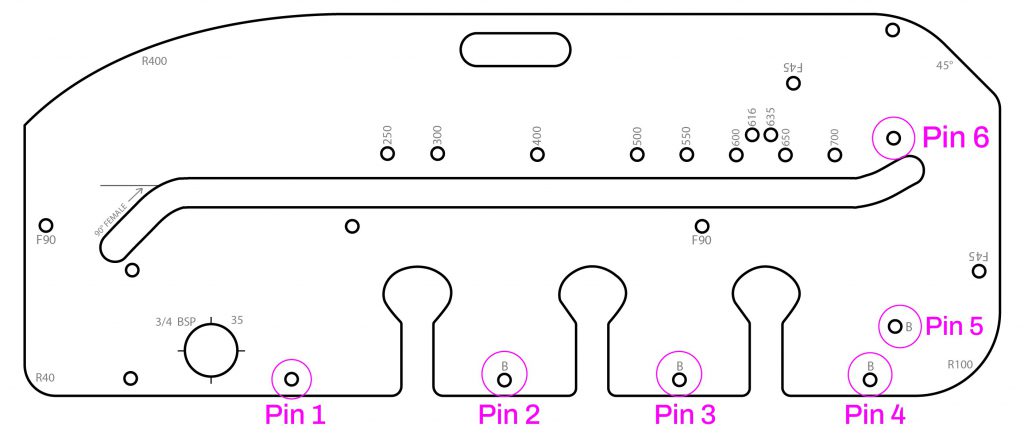
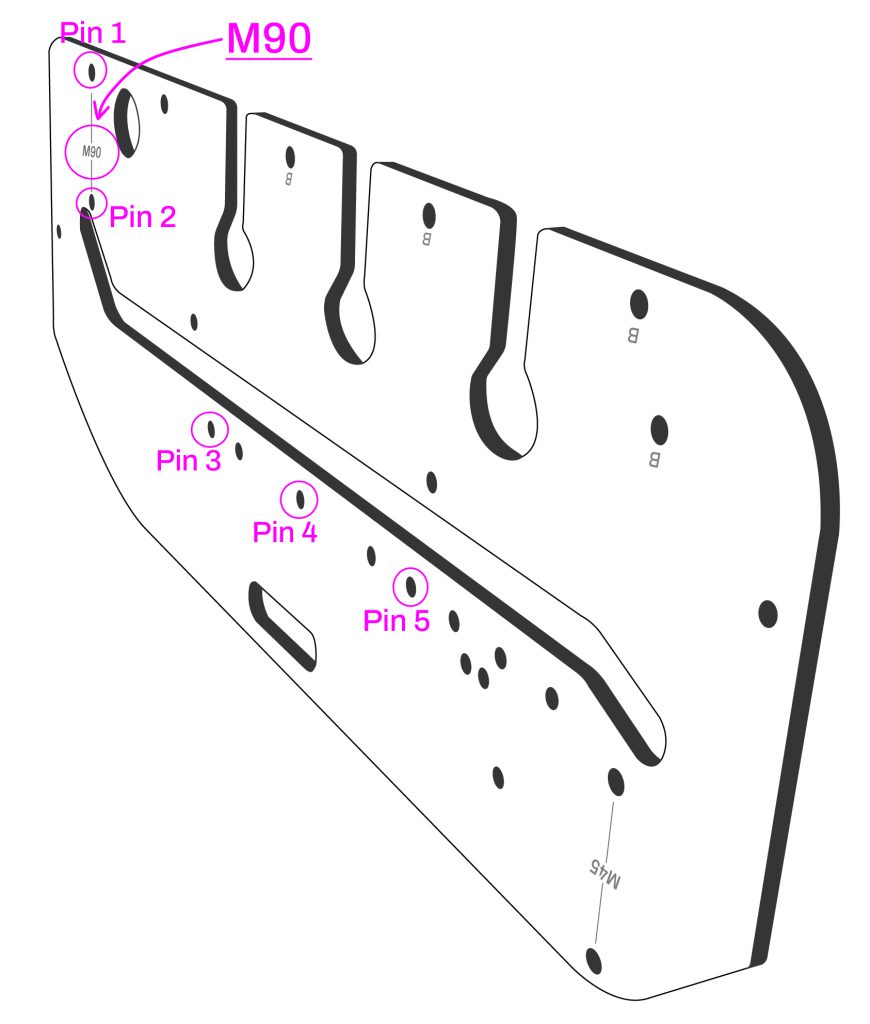
One face of the jig is designed for making the male cut, whereas the other side is for the female cut. The Male is indicated by the letter (M), whereas the Female by (F). Please start by locating each side and the locations of the pins referenced by F90 or M90 and etc.
Lastly, on the female side (F) identify the pins for the width of your worktop. For example, the most commonly used Laminate Kitchen Worktops are 600mm (Pin 4 in Fig 4), so when making the female cut, you would need to insert a pin to the 600mm reference point.
Positioning of the Laminate Worktop
Now that you have familiarized yourselves with the worktop jig, the second important point is the positioning of the worktop.
When making your cuts, please use the diagram in Fig 5 for your reference. If you are cutting the “Right Side”, whilst making the female joint (F), the face of the worktop needs to be facing up, but whilst cutting the male joint (M), the face of the worktop needs to be facing down. Similarly, when cutting the opposite side, the sequence is in reverse, the male is facing up, the female worktop facing down.
Female Cut of Mason’s Mitre Joint

- The female cut is always the first cut
- Cut the worktop to size
- Use Figure 5 to identify whether your worktop needs to be facing up or down.
- Measure the width of your worktop (600 or 650 etc.)
- Position your first 3 pins in F90
- Position Pin 4 to your width slot (Fig 4)
- Push the jig into position and make sure all pins have full contact with the edges of the worktop.
- Clamp the jig into place.
- Start cutting from the side of the bullnose to prevent chipping on the post-formed side (from left to right).
- Cut with 10mm passes.
- Once you finish a cut, loosen the stopper and raise the cutter to make sure it is safe to raise the router.
- During the last cut, beware of the offcut as it will fall down. Ask for assistance or clamp it into place.
Female Side Butt Joint
Once the female cut of the mitre joint is completed, it is now the best time to also do the butt joint. Turn the worktop around and use the Butt Joint setup of the jig. Refer to Figure 6. Butt Joint also has a male and a female side. When choosing which side to use (M or F), instead of going with the female and male side, use the side of the jig which takes the edge that will be facing the wall as your reference point. In other words, Pins 5 and 6 should always be in contact with the edge that goes into the wall.
Position the jig into place, clamp and make 30mm deep butt joint pockets for your connector bolts.
Male Cut of Mason’s Mitre Joint
- Male cut is done after the female one is completed
- Cut the worktop to length with a 200 mm oversize.
- Use Figure 5 to identify whether your worktop needs to be facing up or down.
- Position your Male Pins in M90 on the side and along the length (Figure 7)
- Push the jig into position and make sure all pins have full contact with the edges of the worktop.
- Clamp the jig into place.
- Start cutting from the side of the bullnose to prevent chipping on the post-formed side.
- Cut with 10mm passes.
- Once you cut, loosen the stopper and raise the cutter to make sure it is safe to raise the router.
- During the last cut, beware of the offcut as it will fall down. Ask for assistance or clamp it into place.
- Make sure the fit is perfect and cut the worktop to size.
Male Side Butt joints
Position your pins for the routing of the butt-joint and use the edge that will be against the wall as a reference point.
Position the jig and secure it with clamps. Route 30mm deep butt joint pockets with 10mm passes.
Joining the Worktops
Apply a general silicone compound across the side and top edge of the worktop. Tighten the connector bolts underneath and wipe off any excess silicone from the surface.
We hope that you have found our guide useful! Please let us know if you have any further questions or if you would like to know more about our bespoke services.
If you have any questions about anything worktop related, please do not hesitate to
get in touch with us!
You can find us at 01727260688 or [email protected]
https://houseofworktops.co.uk/
Enjoy your kitchen and wood worktops!
For additional topics please check the links below:
1) What are the toughest worktops?
2) How to measure a radius corner easily?
3) How to repair a scratch on a Wooden Worktop?
4) What is the best bathroom worktop?
5) Kitchen Worktop Height: Everything You Need To Know
7) How to Protect Wood Worktops Around the Sink Area?
8) Worktop Installation Guide
9) Care & Maintenance Guide for Wood Worktops
Antonia Dragolova